Once the event set up is complete, one of the first things you will do is create organisations.
Head to Organisations using either the orange box or selecting it from the left-hand side grey admin menu.
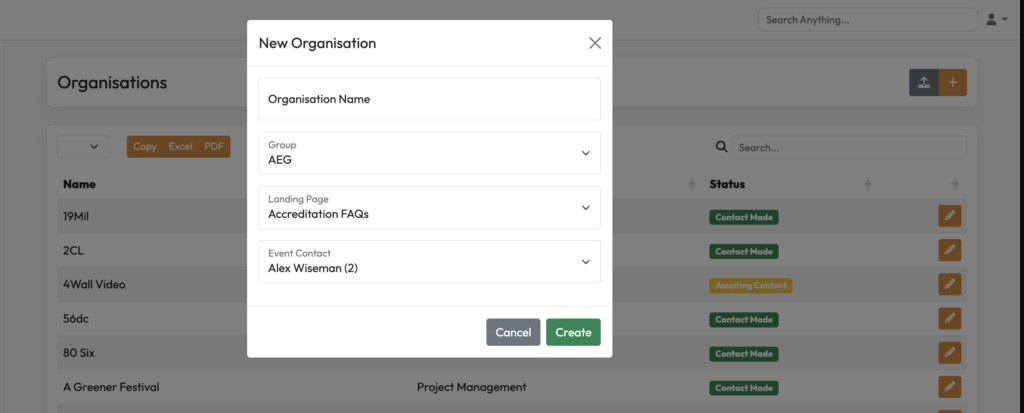
Organisation Name – Name of the company
Group – this is important, the company needs to sit under the correct group for the event as many other items are related to groups such as documentation, landing pages, pass types, inductions & emails. This could be by stage if artist of by department if event accreditation.
Landing Page – Most often we select ‘HOMEPAGE’ for this option but if your event has bespoke pages created per group you need to be cautious to choose the correct one intended for this organisation to see.
Event Contact – You can either put yourself or the event accreditation lead.
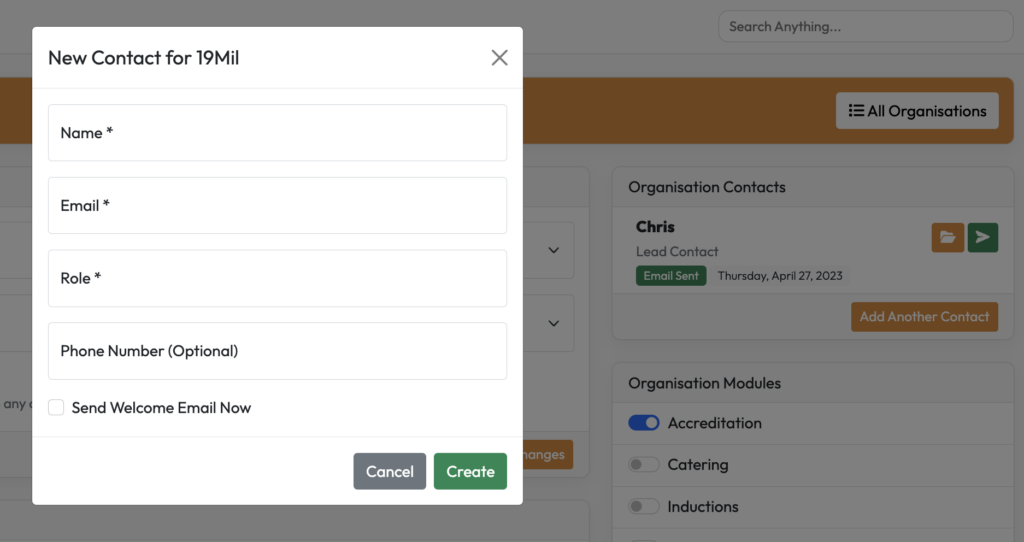
Adding a lead contact.
Click add another contact, fill in the details for that person. I would recommend NOT sending them the link until the modules and allocations are all in place.
Modules
Once an organisation is created, you need to choose which modules their lead contact can see. Please note that not all modules are used for an event so the modules you see here are the ones that have been pre-set by the accreditation lead, not all that are available.
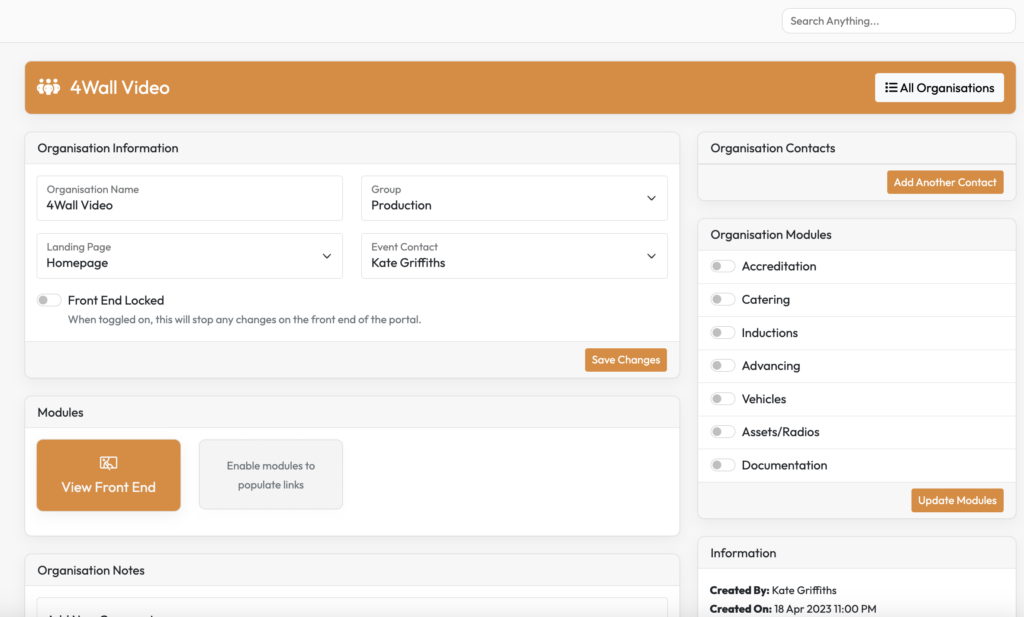
Accreditation – this module is for adding passes for individuals and nearly always selected.
Catering – not all events will be catered & not all organisations will be fed so please check this before making the module visible to the lead contact.
Inductions – this module enables the lead contact to view their team progress on inductions and resend emails to those who have not yet completed.
Advancing – some events have bespoke forms to collect the information needed, please check with your accreditation lead if this is required.
Guest List – if your event is running any guest list through the system this module would need to be toggled on.
Vehicles – this module is for adding vehicle passes and usually selected.
Assets/Radios – this module is currently not being used but will be a module to order site ordered assets in future.
Documentation – this module gives the lead contact access to the library for event documents and gives the area for them to upload files required by festival management.
Choose the ones you’d like the organisation to see and click update modules.
ALLOCATIONS
You will need to set allocations for individual passes, vehicle passes, catering & guestlist.
For individual passes:
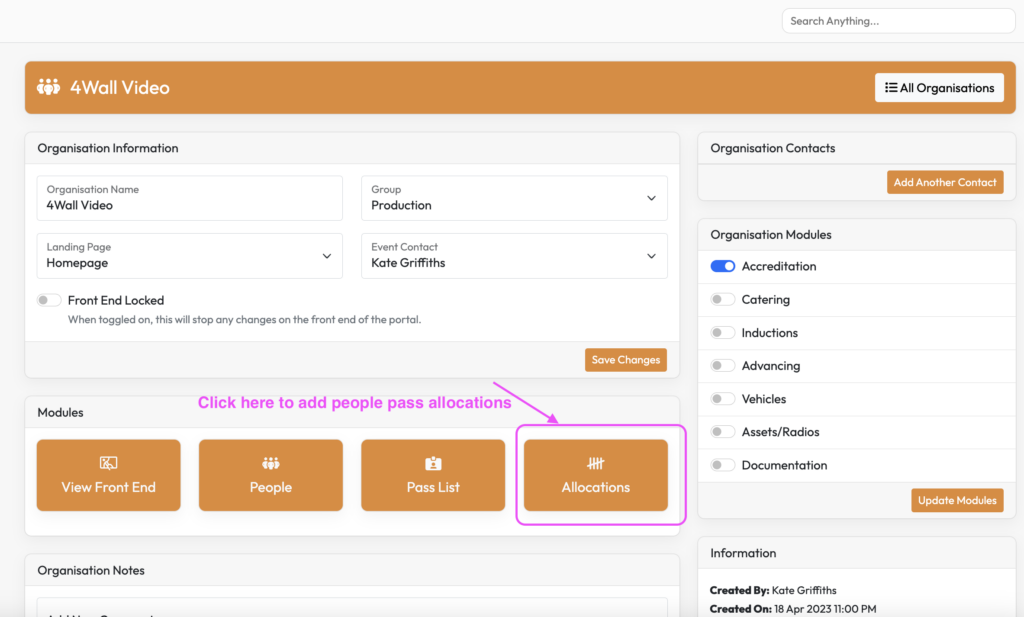
Click on allocations then use the ‘+’ symbol top right to add passes. Choose from Pass Type then enter the amount.
For Vehicle Passes
Go to the Vehicles section on the left-hand grey admin menu and select Allocations nestled under there.
Click the ‘+’ symbol top right to add an allocation. Choose the Organisation then Pass Type then Quantity and click ‘Create Allocation’.
For Catering
Check with your accreditation lead if the set-up is being done by group or by individual.
INDIVIDUAL
Under CATERING>ALLOCATIONS you’ll see the organisations & which type of request type they have.
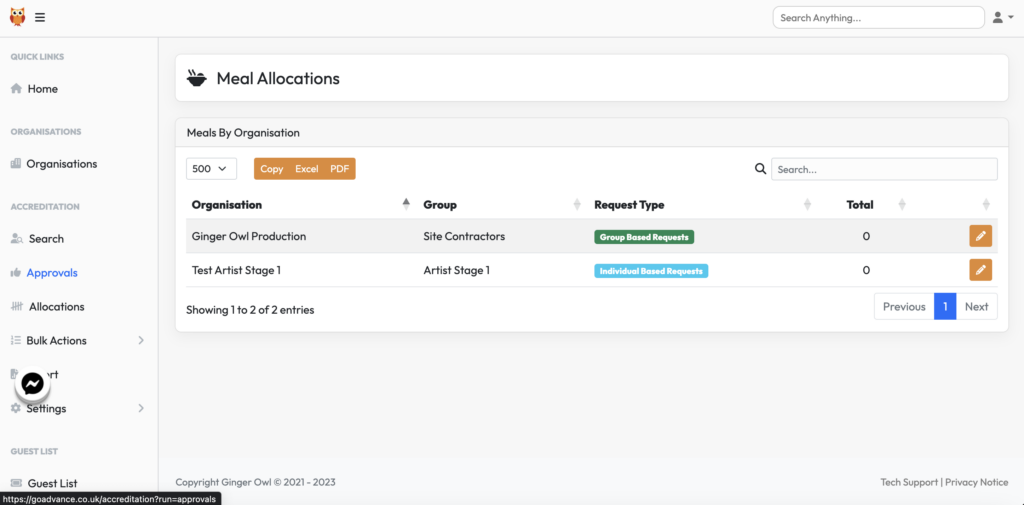
Click the pencil on the right to update the allocation for that company.
Setting the numbers:
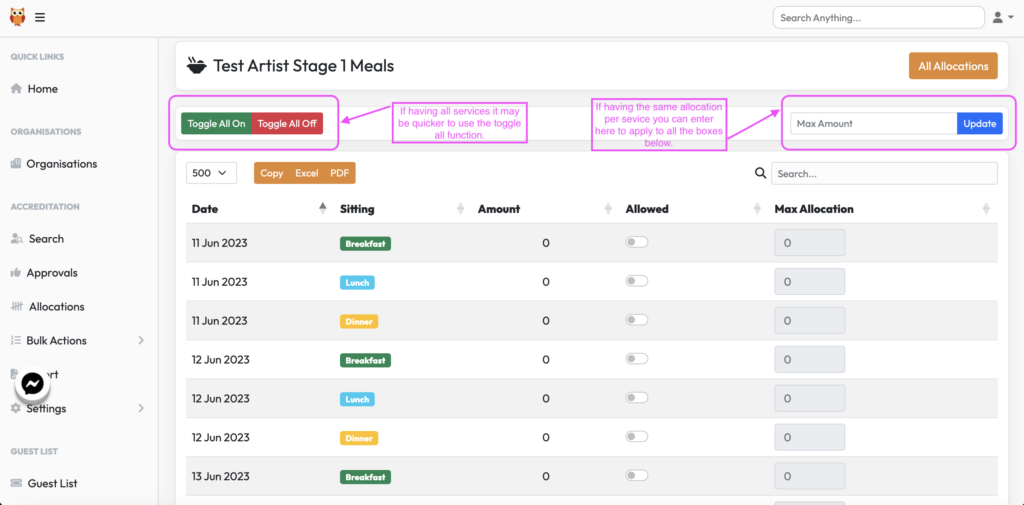
Here is where you would set whether the service is visible to this organisation and what the maximum number of meals they can have. If the allocation number is the same for every meal, you can add it top right in the “max amount” box and click update and it will apply it to each service.
Little Kate Hack
If the org is having Lunch & Dinner but not breakfast, rather than having to individually toggle you can do the following:
Select Toggle On for ALL meals and say yes to the pop up. Type ‘break’ in the search bar which will bring up just those services. Select Toggle All Off and say yes to the pop up, all the breakfasts only have been turned off.
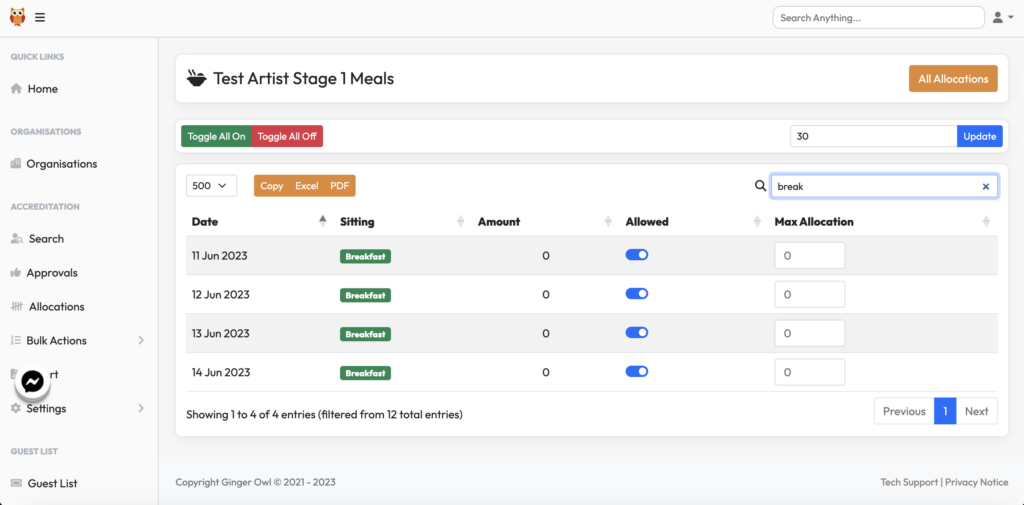
After you go back to view all services.
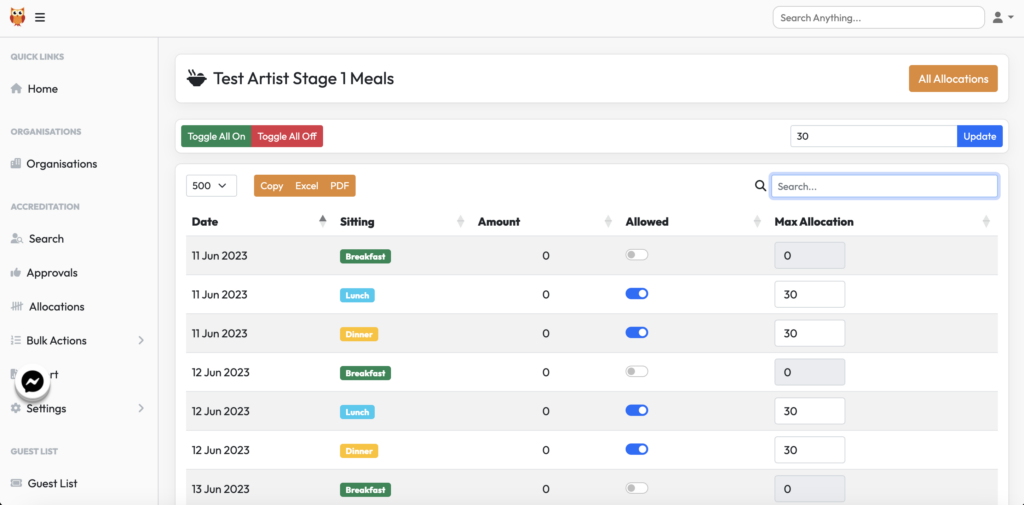
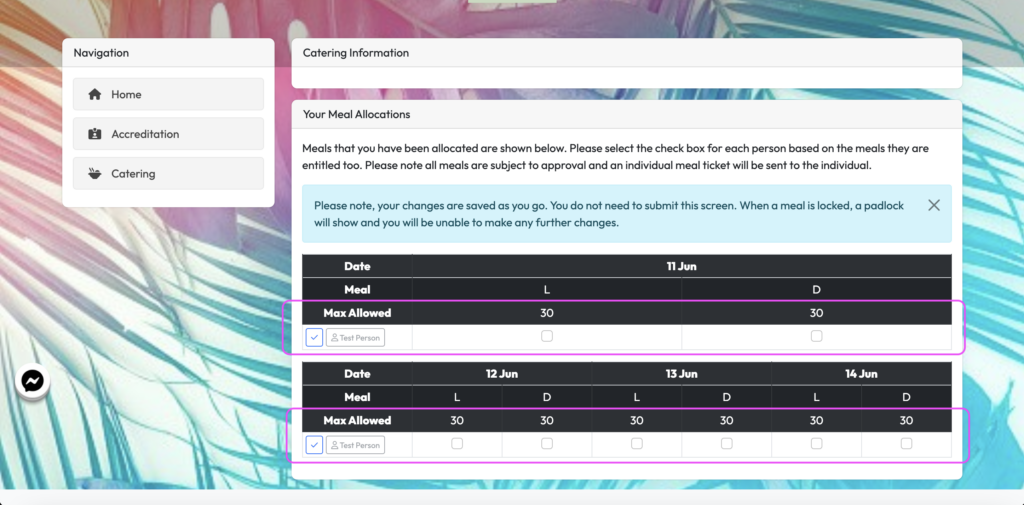
When logging into the front end you can see the services, the allocation and then a line per person that have been entered into the Accreditation section of the organisation. The lead contact would then tick the box for each meal that person was going to have.
GROUP
Under CATERING>ALLOCATIONS you’ll see the organisations & which type of allocation they have.
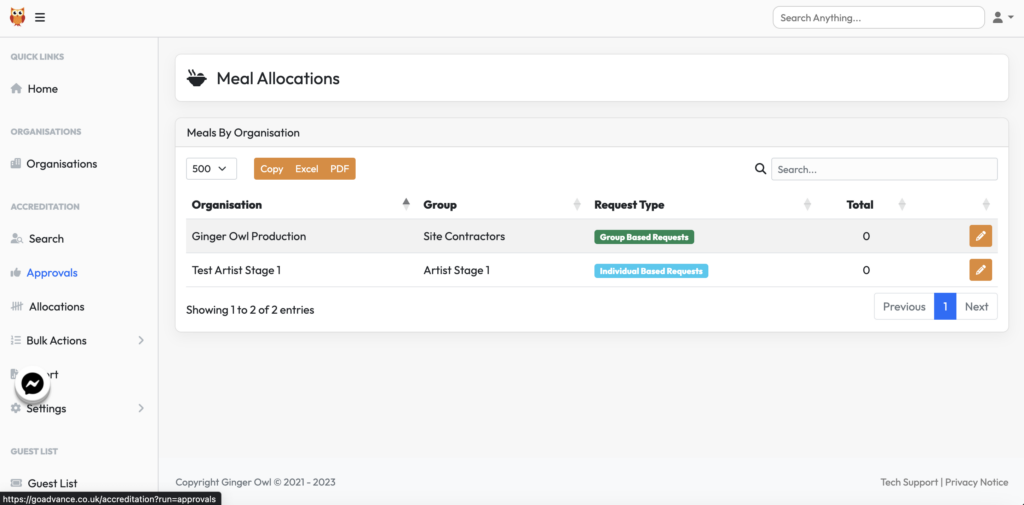
Click the pencil on the right to update the allocation for that company.
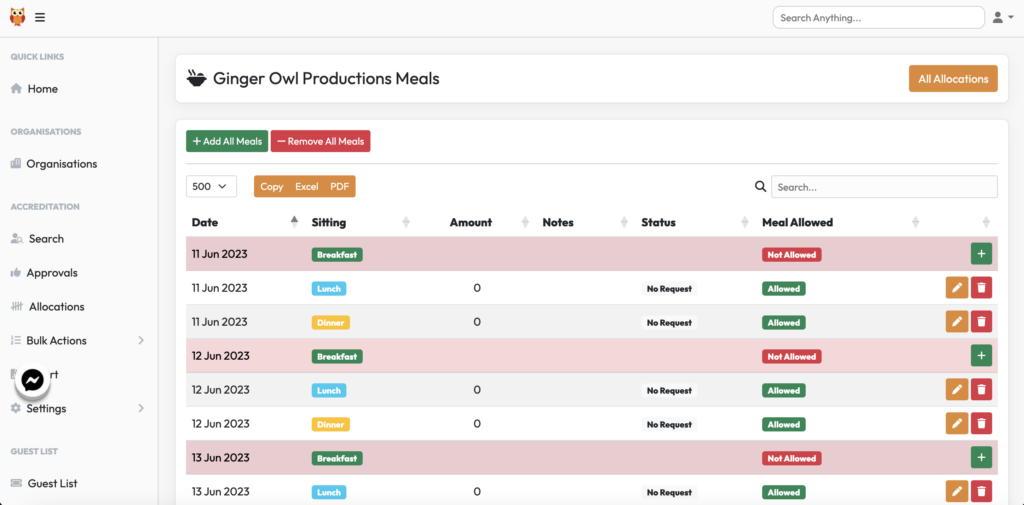
You can use the “Add All Meals” or the green + symbol to add what services you want an organisation to have access to.
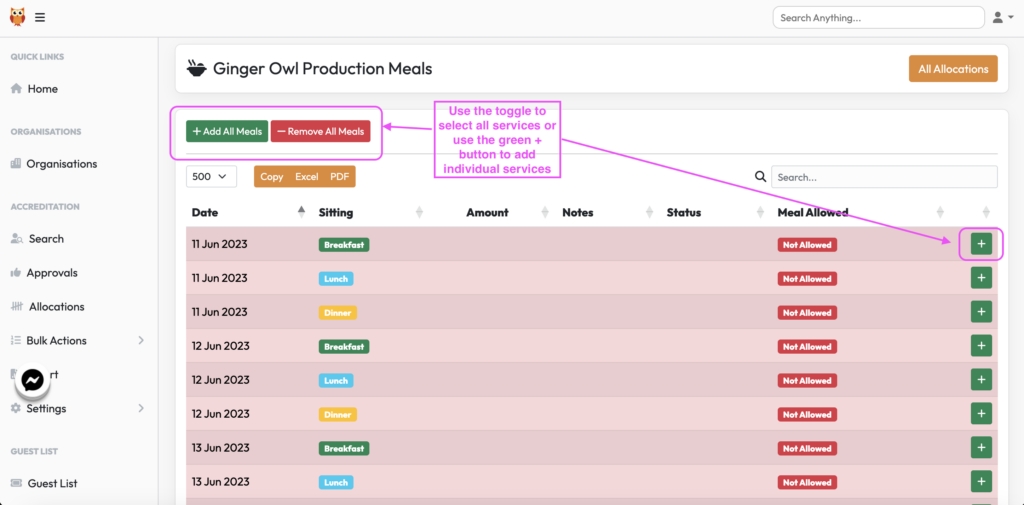
Little Kate Hack
If the org is having Lunch & Dinner but not breakfast, rather than having to individually add you can do the following:
Select “add all meals”, type ‘break’ in the search bar which will bring up just those services. Select “Remove All Meals”, all the breakfasts only have been turned off.
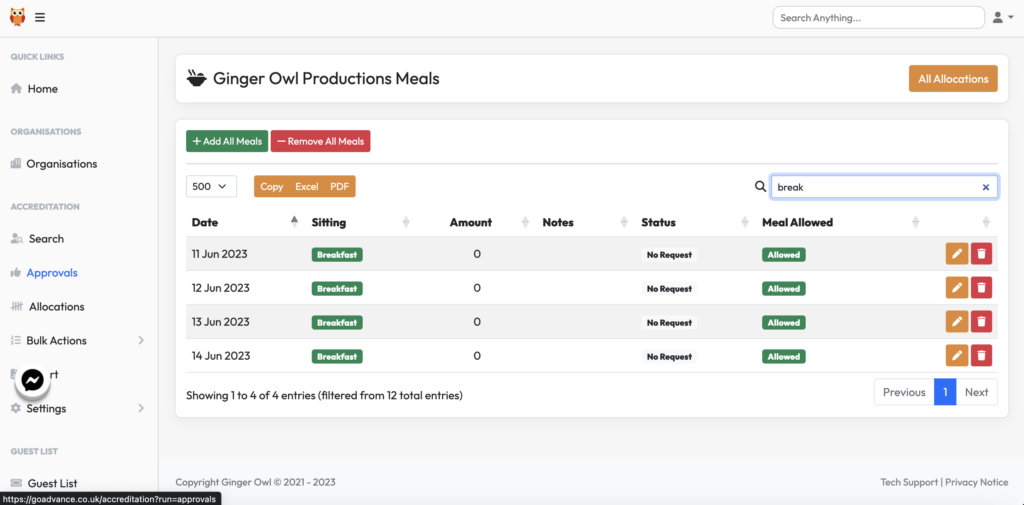
After you go back to view all services.
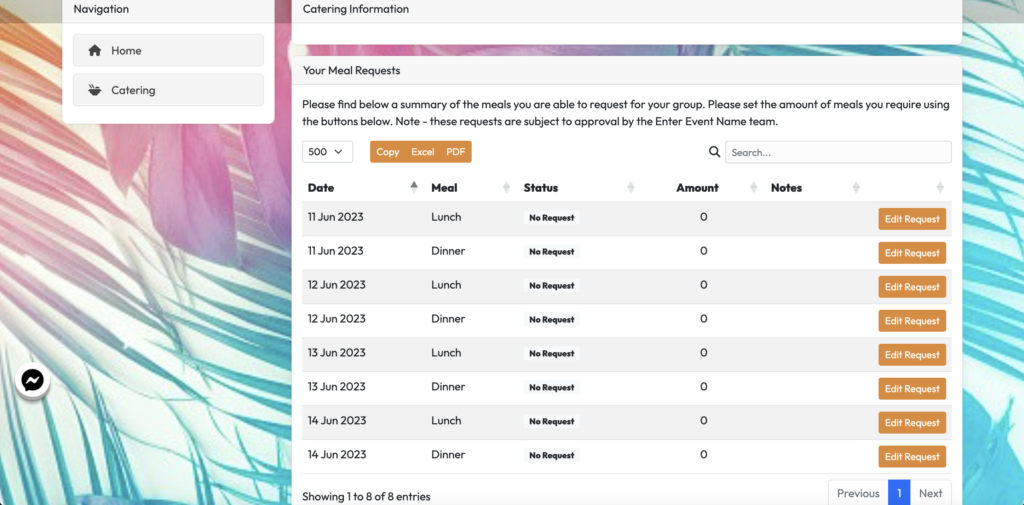
When logging into the front end you can see the services, the lead contact would then click Edit Request to add the number of meals they are requesting for their organisation.
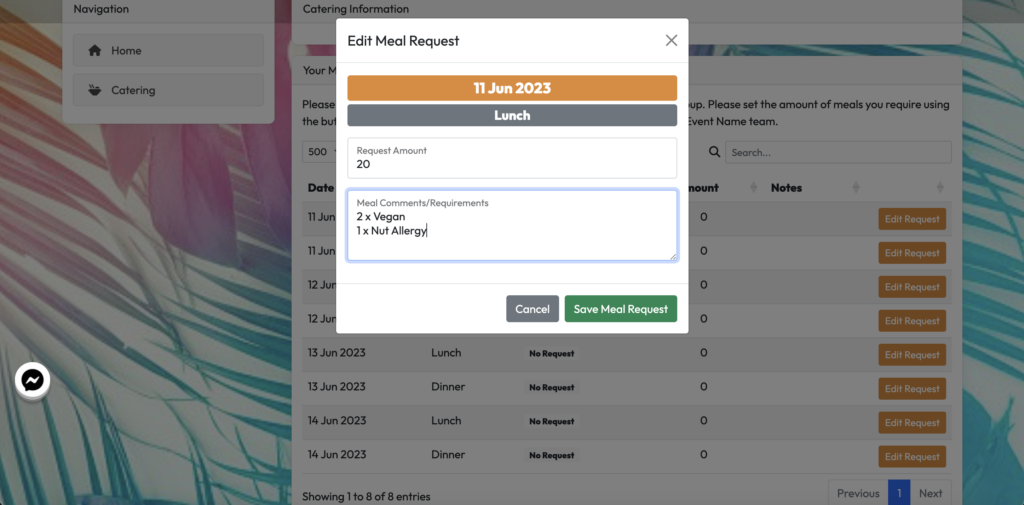
The lead contact can add number of meals required and add any dietary notes and then click ‘save meal request’.
Guest List
Go to the Vehicles section on the left-hand grey admin menu and select Allocations nestled under there.
Click the ‘+’ symbol top right to add an allocation. Choose the Organisation then Pass Type then Quantity and click ‘Create Allocation’.
