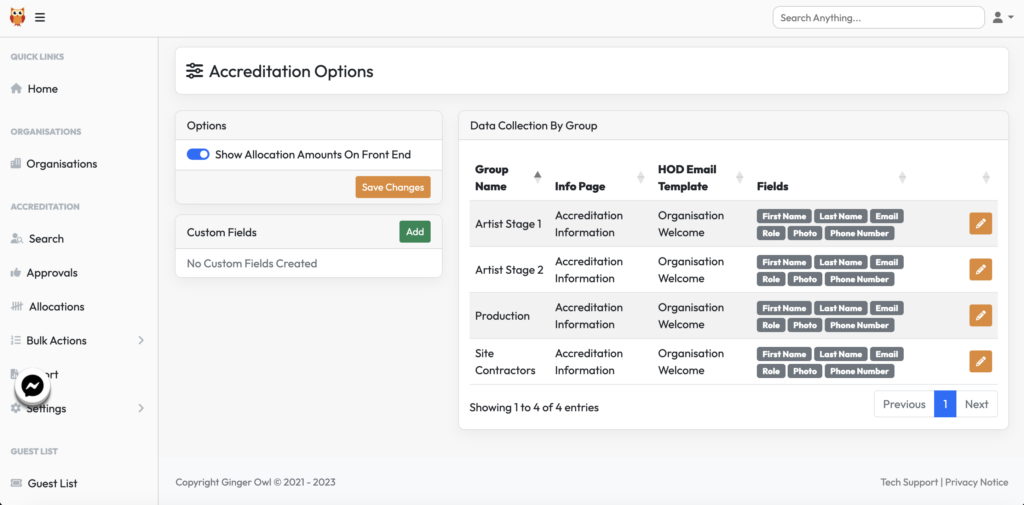
From the grey menu bar, select the Settings which are nestled under Accreditation.
Here you have some options to choose based on your event spec.

1 – Does your event want the allocation amounts to be shown on the front end to the organisation lead contact. If yes, they will see ‘3 of 20’ for example when adding a person. If not, they will just be unable to add any more passes if they hit the limit set in the background. Slide the toggle and click Save Changes for your desired option.
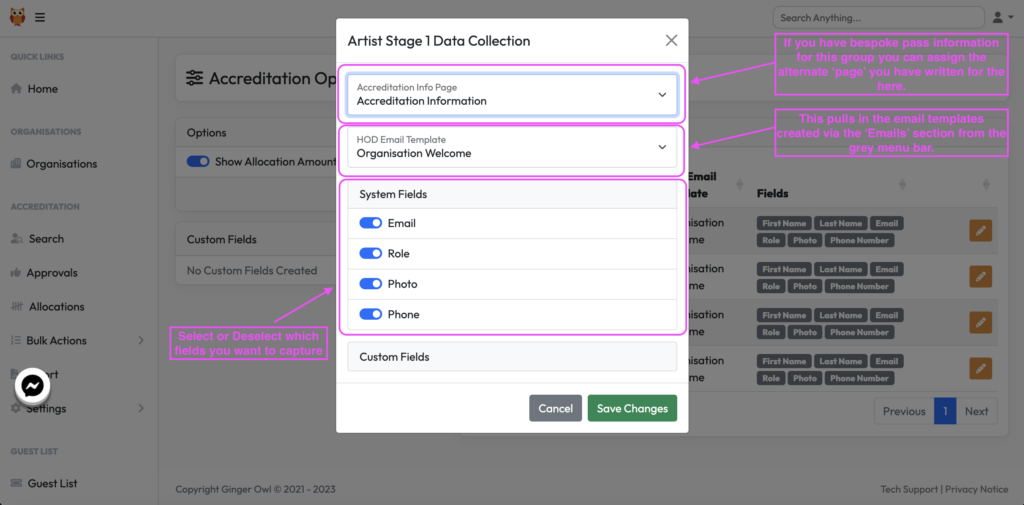
2- Pre-set for you are some of details that will be asked of each accreditation request. As you can see these are set by group so if for example, you want email addresses of site contractors, but you don’t want emails of artists you can click the pencil to edit.

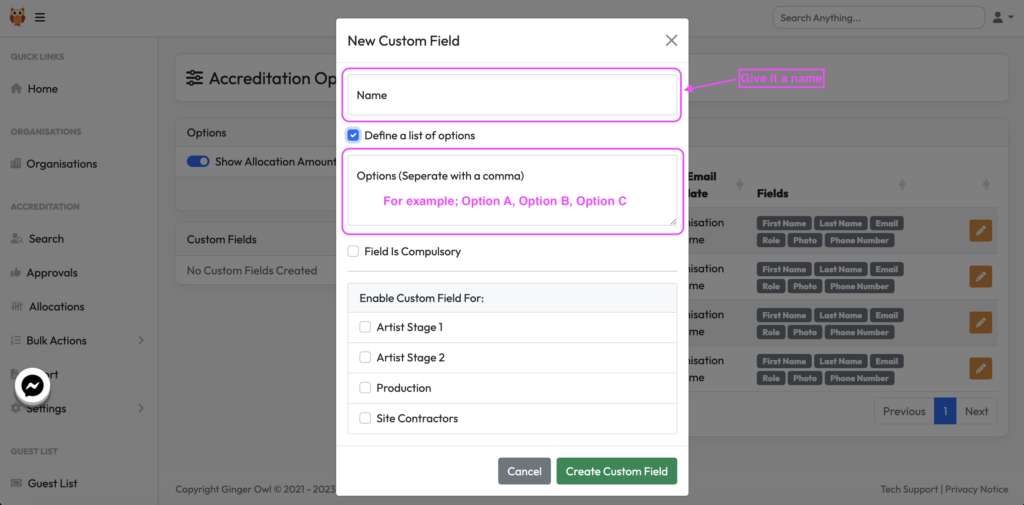
You can also create a custom field on this page to capture information also. Click Add on custom fields, give it a name, and choose if it is compulsory.
It might be that you have a series of options for them to pick from a list. If so click ‘define a list of options’ and then list those options in the format Option A, Option B, Option C using a comma to separate each option.
It maybe you only want this field to be seen by certain groups so here you click the groups that you do want to see the field and click ‘create custom field’.

