Click on the + in the top right corner to start the process to create an induction form.
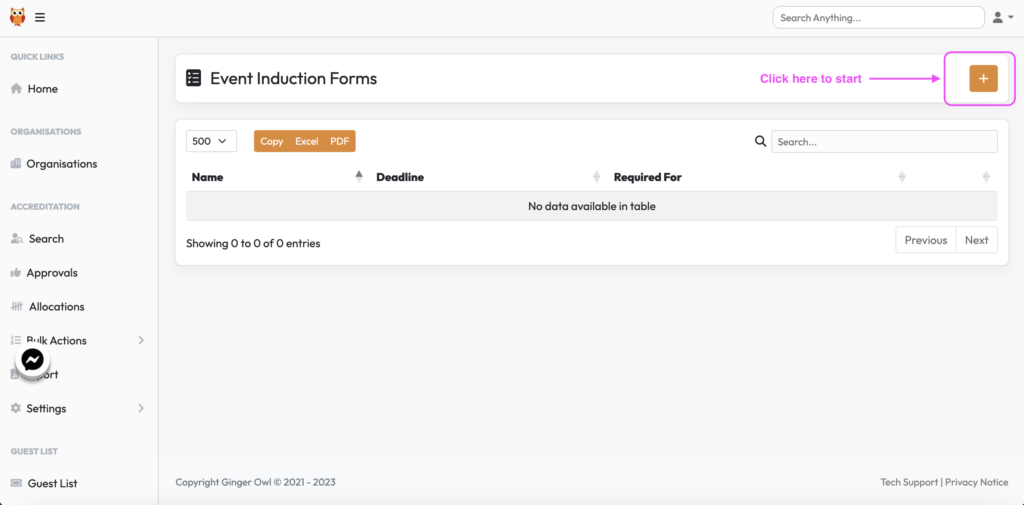
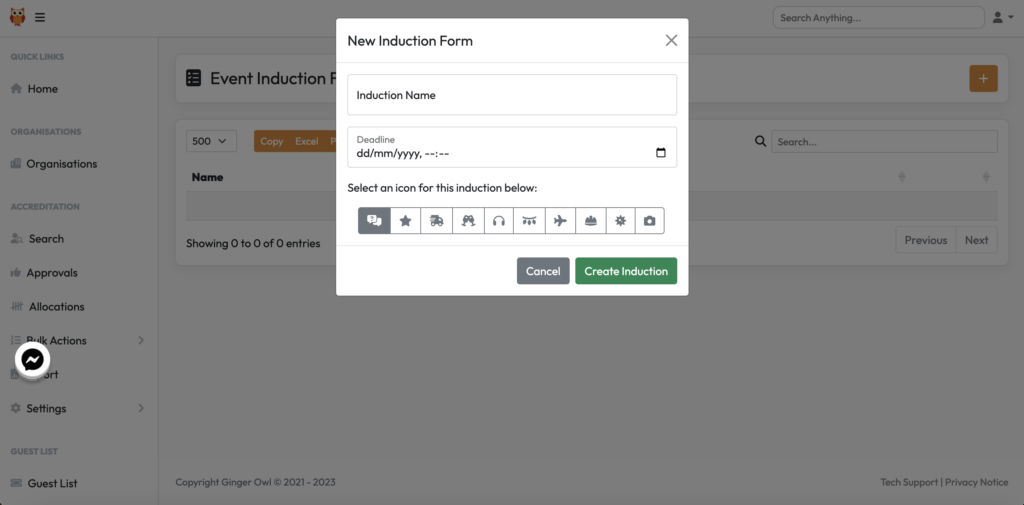
Create an induction name and add the deadline date. We often put the last date on site on there as the same form will be applicable for both build & break periods, so you don’t want it to be inaccessible to those teams only coming in for break.
You can assign it an icon if it pertains to a certain part of the event or just because! Click Create Induction.
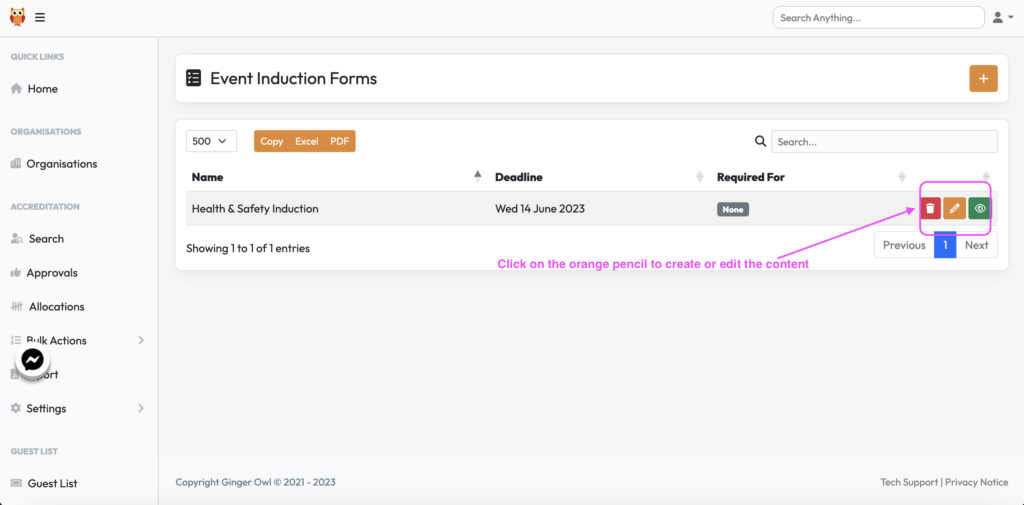
The induction appears in the list so you can click on the orange pencil now to enter the detail in the first instance or edit is required once set up.
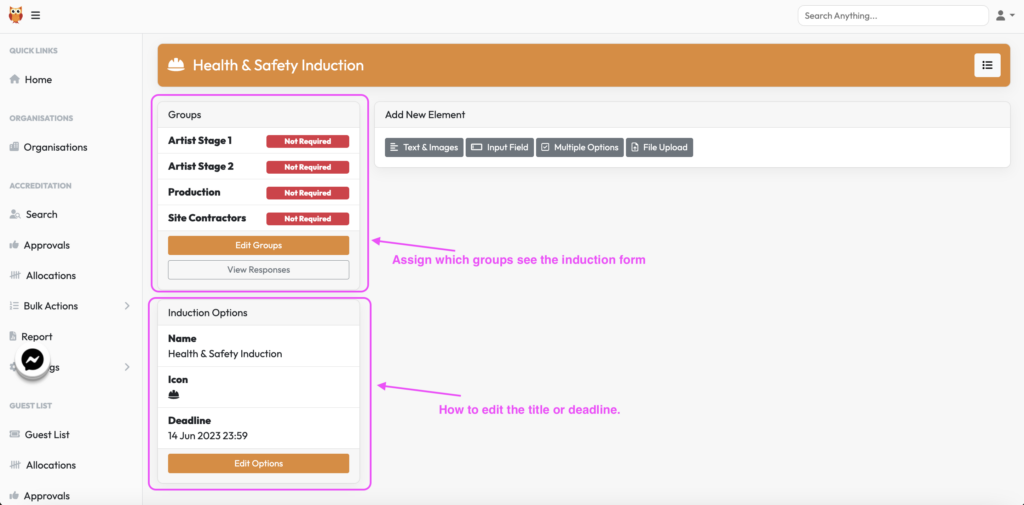
Top left is where you can assign which groups can see this induction form.
Bottom left is where you can edit the title, icon or deadline.
The next thing to do is to create the actual content. This would normally come from the client but may be a combination of copy from the client with a requirement to add in some bespoke fields to capture data.
Below is a run through of the different field types you can choose from with some use cases.
Text & Images
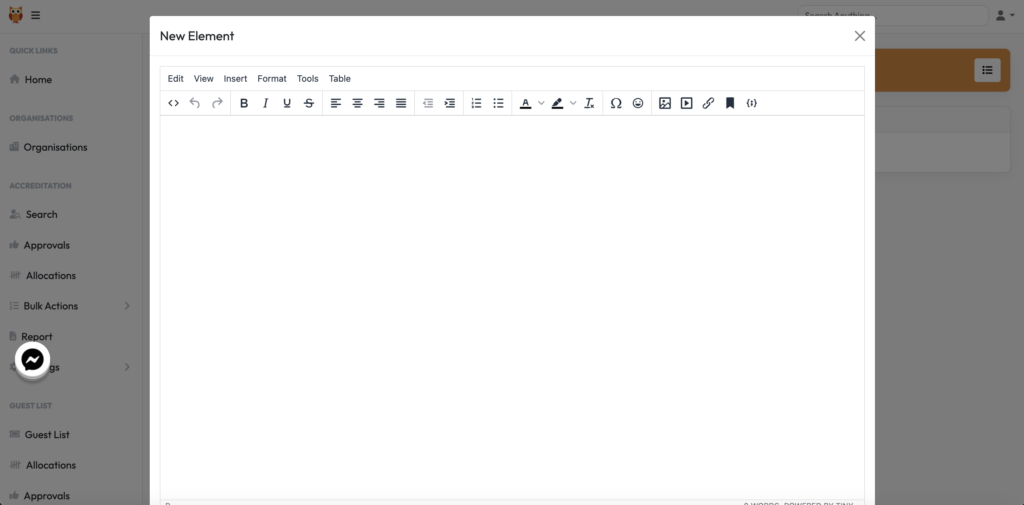
This will be the most common field you’ll use as you can copy and paste a word documents contents into this field and upload images of the logo to make it look good for the user who will be reading it.
Input Field
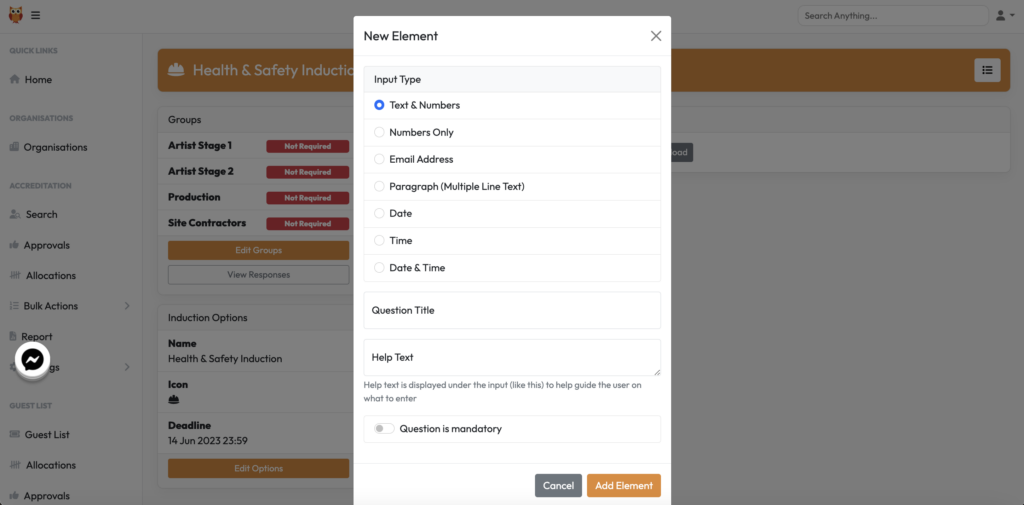
Most are self-explanatory but a list of the input options;
Text & Numbers – best one to use for information such as reg numbers or license numbers with a combination of both alpha & numeric characters.
Numbers Only – best used when capturing a phone number.
Email Address – ensures the correct email format is used and prompts the user if incorrect.
Paragraph – best one to use for a free text answer as user can use any characters.
Date – dd/mm/yyyy format.
Time – 00:00 format.
Date & Time – Joint of the two above, good to use if you want to timestamp when someone has completed the induction.
For all of these you need to set;
Question Title – Literally, what is the question.
Help Text – a little guide to help the reader know what information you need for this question.
Question Is Mandatory – toggle the switch to make this question mandatory for the user to complete. Good for confirmation they have read the induction or email addresses etc.
Multiple Options
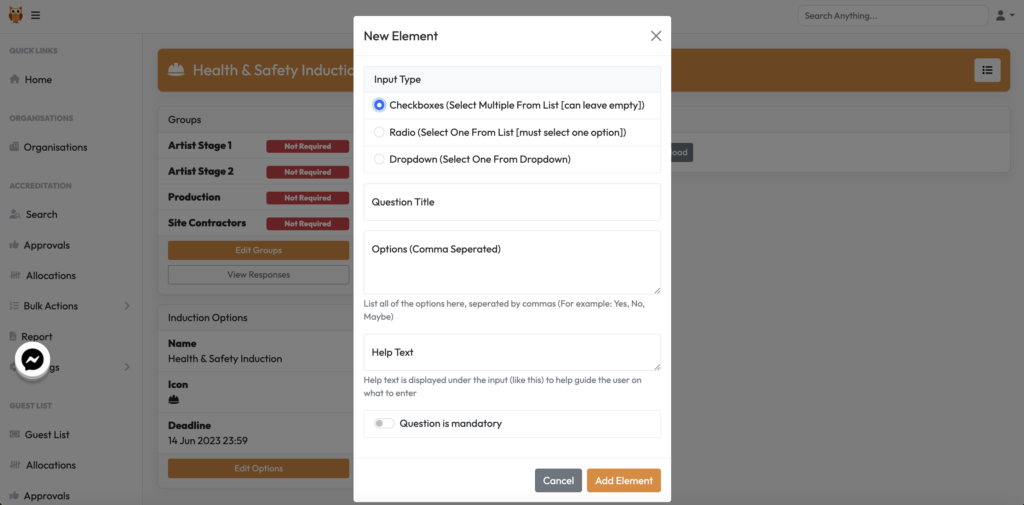
There are 3 main ways to build in a multiple choice question into the form.
Checkboxes – this is best when the user can select more than one option from the boxes and choose to leave the one unchecked they don’t want.
Radio Select – radio refers to the highlighted circle dot made when selecting. This choice forces the user to only select one option from the list.
Dropdown – this is where you click the field and a list of options appears as a list for the user to pick from. Again this option is for when users have to pick just one option.
Question Title – Literally, what is the question.
Options – Here you provide your list of options, the only must here is that the options are separated with a comma such as Option A, Option B, Option C.
Help Text – a little guide to help the reader know what information you need for this question.
Question Is Mandatory – toggle the switch to make this question mandatory for the user to complete. Good for confirmation they have read the induction or email addresses etc.
File Upload
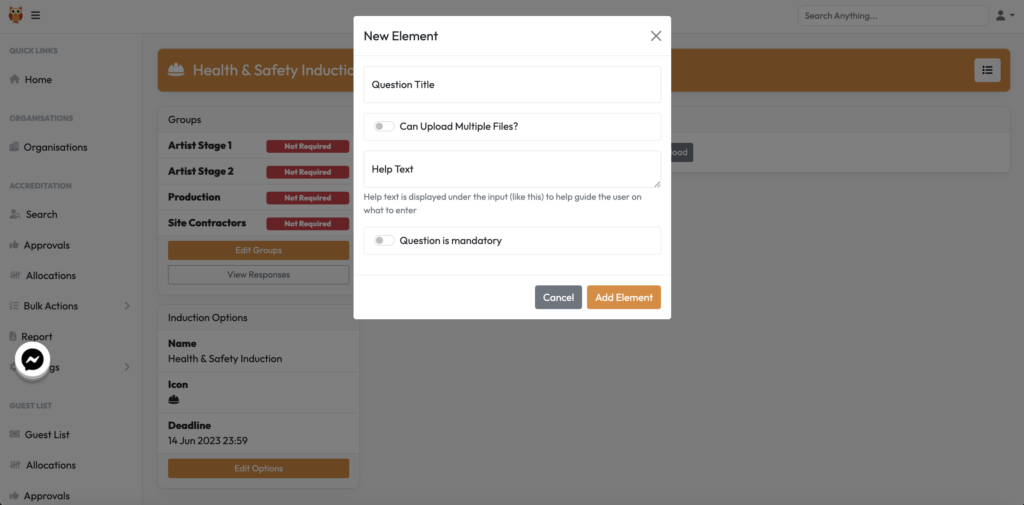
Sometimes you need an individual to upload a supporting document so you would use File Upload to achieve this.
Question Title – Literally, what is the question.
Can upload multiple files – always a helpful one to toggle to ensure the user can upload more than one file.
Help Text – a little guide to help the reader know what information you need for this question.
Question Is Mandatory – toggle the switch to make this question mandatory for the user to complete. Good for confirmation they have read the induction or email addresses etc.
